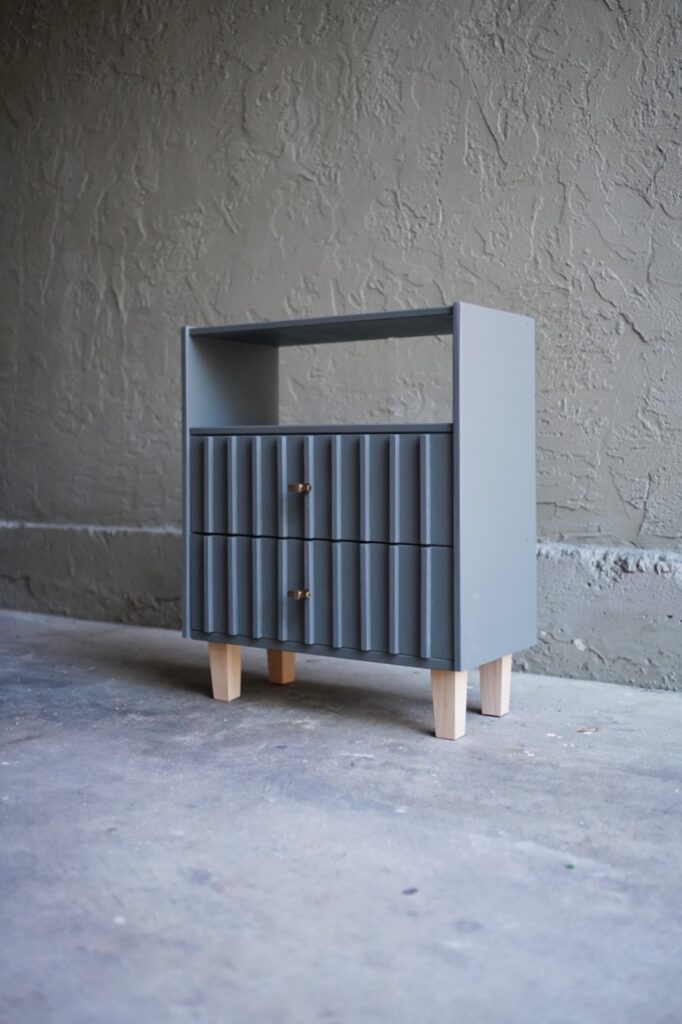
Design Concept
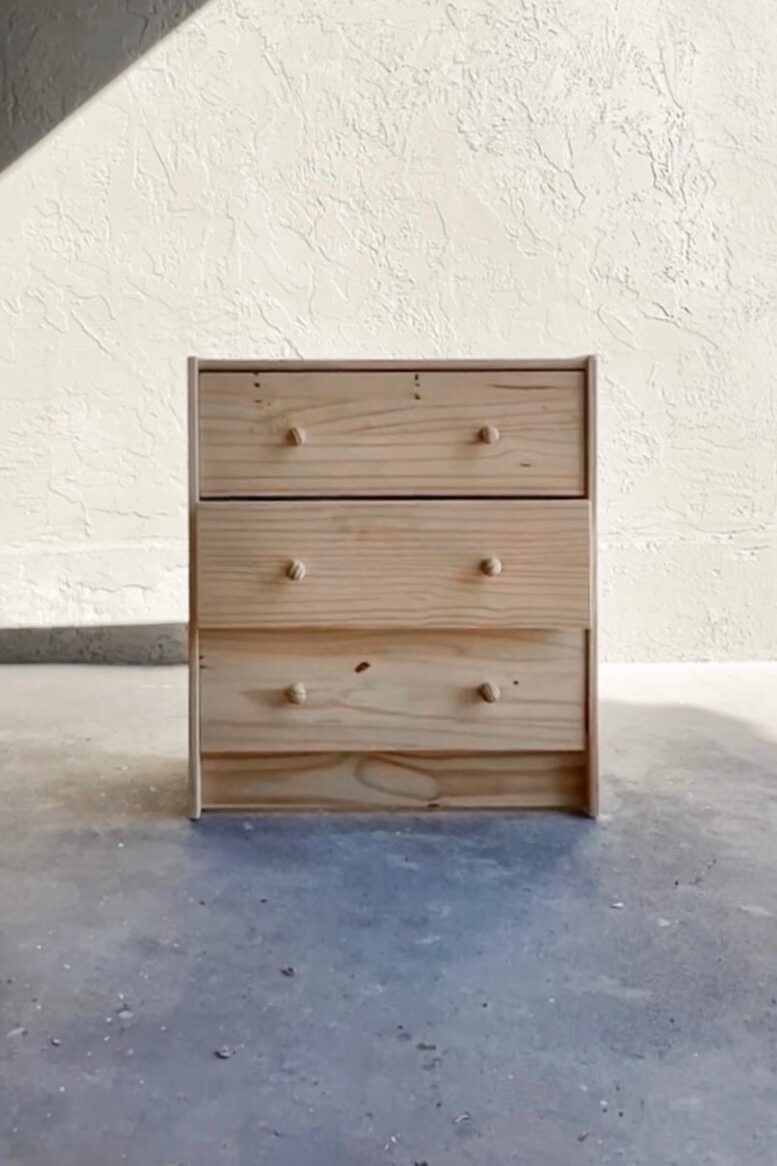
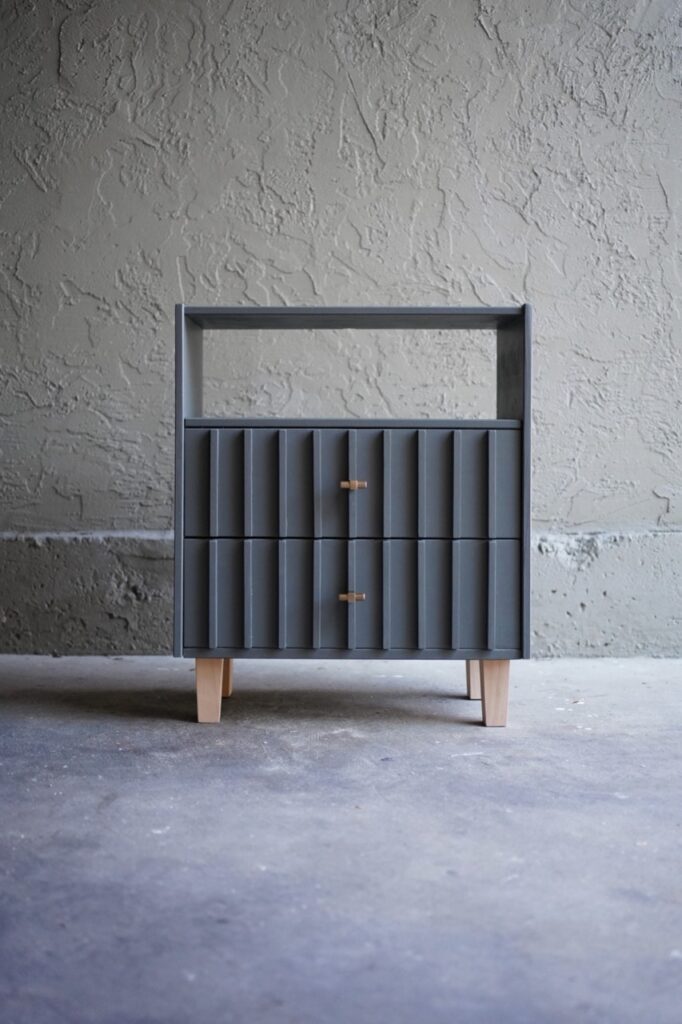
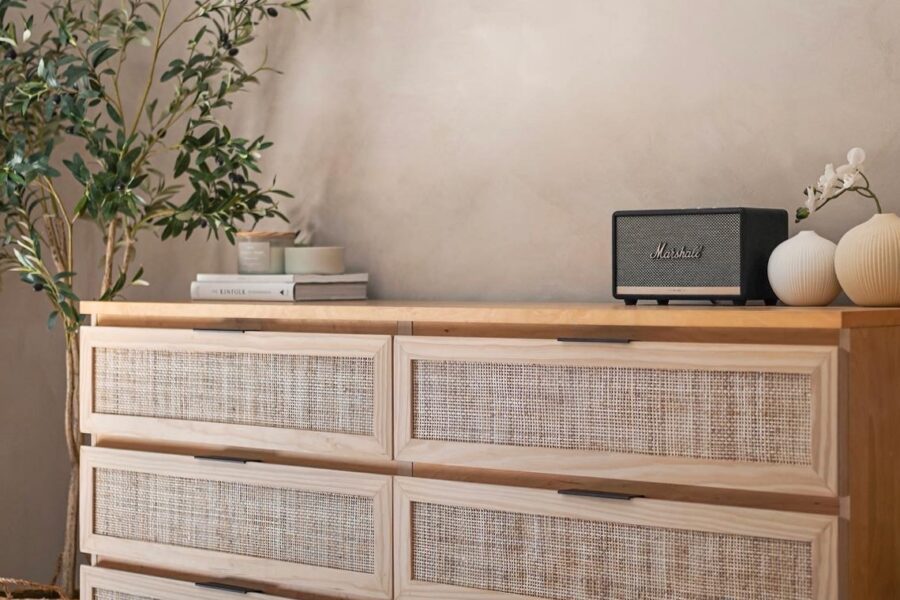
In this IKEA hack, I flipped the Rast dresser by removing the top drawer, built shelves above the second drawer and below the third drawer, gave the remaining two drawers a fluted design and redesigned the legs to give it a more modern look!
For the drawer design, I added wooden, square dowels to give it a fluted look. In terms of fluting, you can also use pole-wrap. To see what that looks like, check out my post on How to add a Fluted Design to the Malm Dresser.
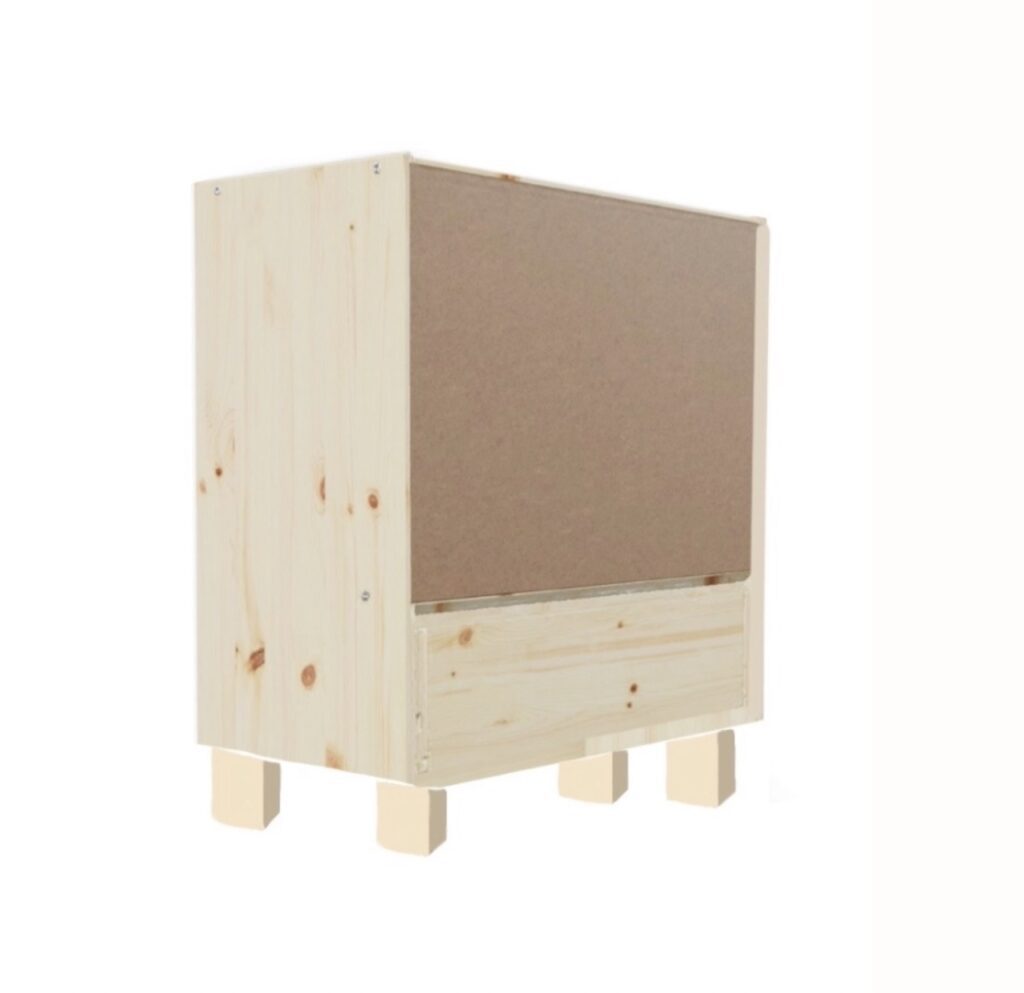
For the back, there is an existing fiberboard behind the first and second drawer. As I didn’t want anything behind the first drawer, I removed this and reattached it so it sat behind the second and third drawer. Lastly, I painted the dresser grey and added gold handles.
Tools and Supplies Used
Below is a list of tools and supplies used.
Affiliate disclosure: when a purchase is made through the links below, I may earn a small commission from qualifying purchases on Amazon and other retailers.
- Square Wooden Dowels: link.
- Drill & Driver: link.
- Circular Saw: link.
- Sander: link.
- Nail Gun: link.
- Wood Filler: link.
- Wood Glue: link.
- Wooden legs: link.
- Drawer handles: link.
- Shellac-Base Primer: link.
- Dense Foam Roller: link.
- Edge Brush: link.
- Kreg Pocket Hole Jig: link.
- Kreg Pocket Screws: link.
- 90 Degree Ruler: link.
Step-by Step Guide
Creating the Top and Bottom Shelf
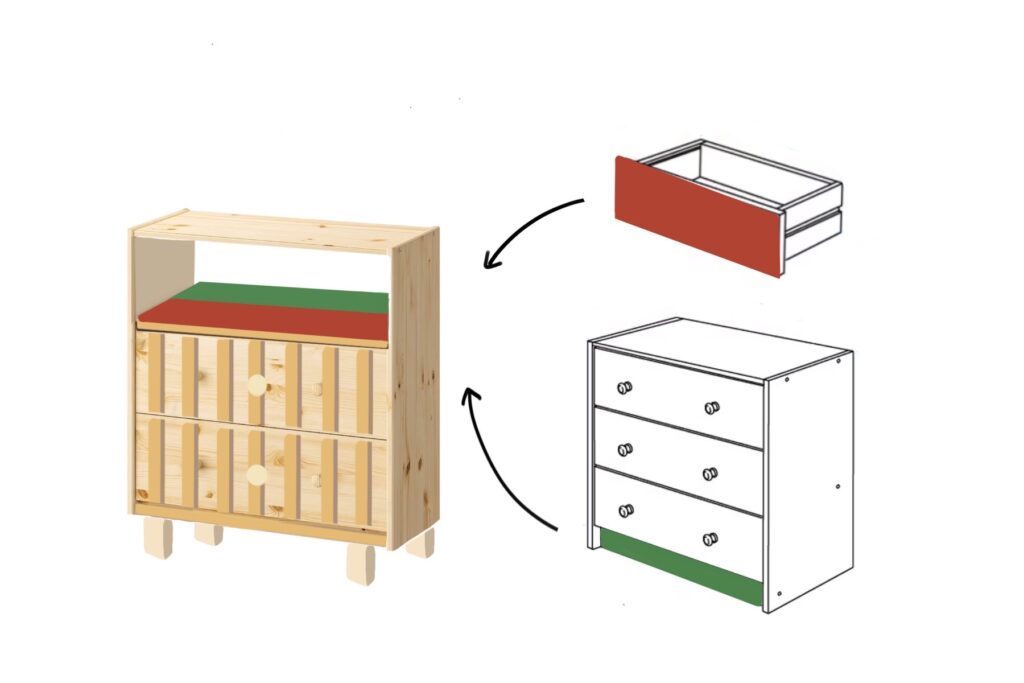
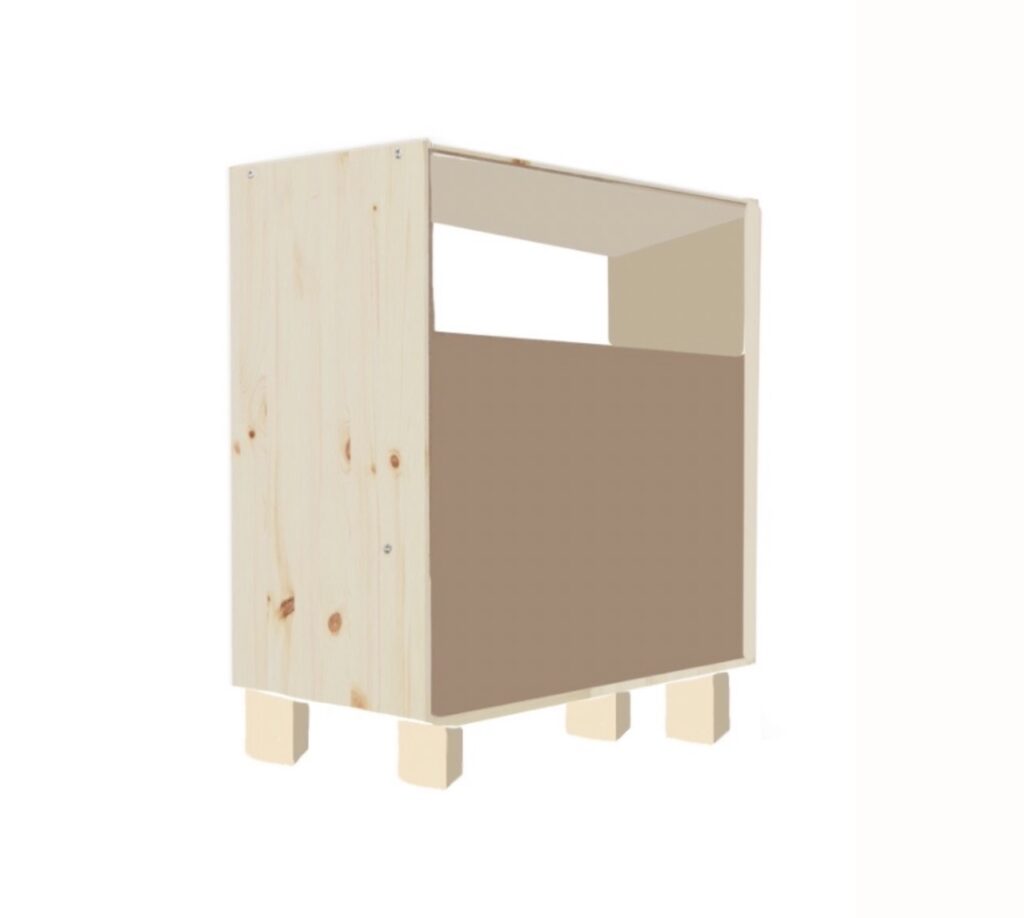
- Remove and disassemble the top drawer.
- Remove the base piece of wood under the 3rd drawer.
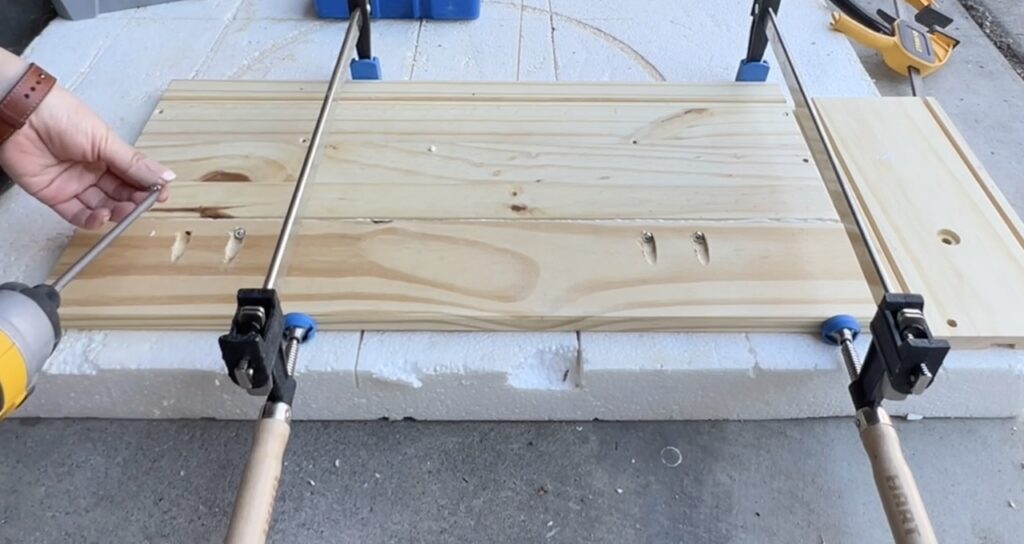
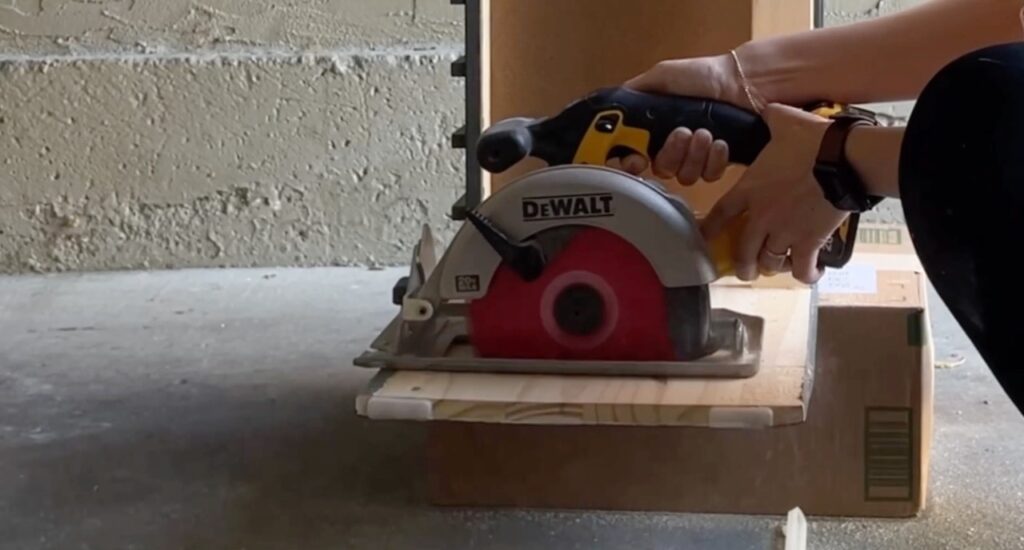
- To create the top shelf, join the wood from the front of the first drawer, with the base piece of wood by using pocket holes and pocket screws. To do this, set the Kreg pocket hole jig at 1/2” and drill holes along the edges of one of the pieces of wood. Then apply wood glue along the same edge, place the 2 wood pieces together, screw into the pocket hole with 3/4” screws and use a clamp to hold the 2 wood pieces tightly together while it dries.
- You’ll notice the base piece is a little bit longer than the drawer piece, so trim the base piece flush.
- For the bottom shelf, use the same wood joining technique and join a solid piece of wood with plywood and make sure it’s the same dimension as the top shelf.
Alternate Option: instead of joining 2 pieces of wood, you can use also use one large piece of solid wood but this may be more expensive or use one large sheet of plywood. If using plywood, you’ll need to edge band the side to make it look prettier. - Next, drill pocket holes along the three edges of both shelves that’s not front facing, and use pocket screws to attach these two pieces of wood to the dresser. Make sure to leave a slight gap between the wood pieces and the drawers to ensure the drawers are able to open and close well.

Adding a Fluted Design to the Drawers
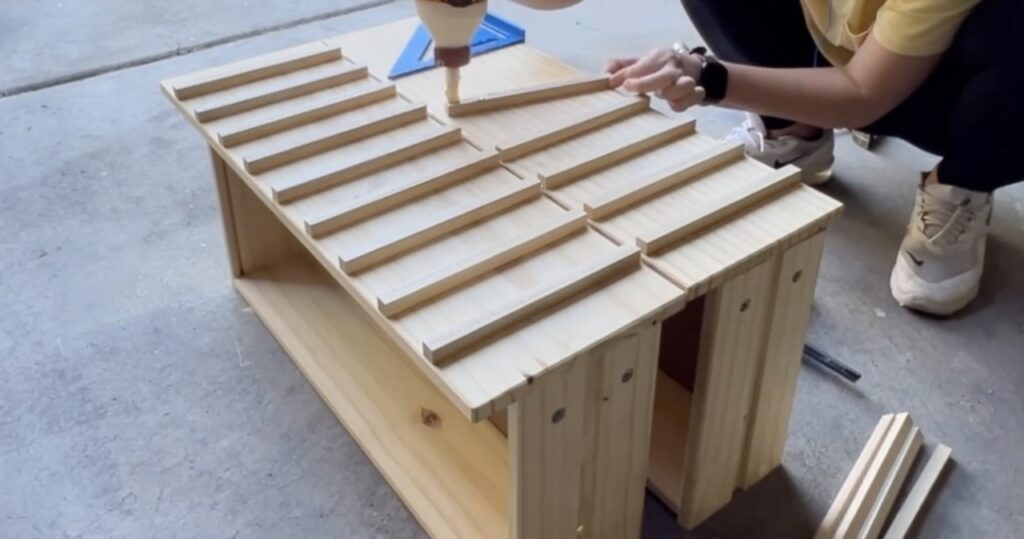
- For the drawers, I used square wood dowels and cut 19 of them them to the same length of the drawers which is 7-5/16” inches.
Alternate Option: depending on your preference and also what supplies are available, you can also use pole-wrap. See post: How to add a Fluted Design to the Malm Dresser. - Then use wood glue, clamps, and a 90 degree ruler, to stick each piece of dowel to the drawers, spacing them 1-7/8” apart. Remember to map it out and double check all the spacing before glueing it on.
Changing the Leg Design

- At this point, you can see if you like the original legs. If you do, you can keep it as is, move onto the section “Painting the Dresser”. If you don’t, first draw a line under the bottom shelf, then unscrew the bottom self and cut off the existing legs along the line you drew.
- Next, screw the bottom shelf back. It should be flush with the sides.
- To attach the legs, measure and mark where you want the legs. Next, drill a hole 1/2” in diameter and about 1” deep into the base structure, then screwed in the metal plate, and lastly screwed in the wooden legs.
Painting the Dresser
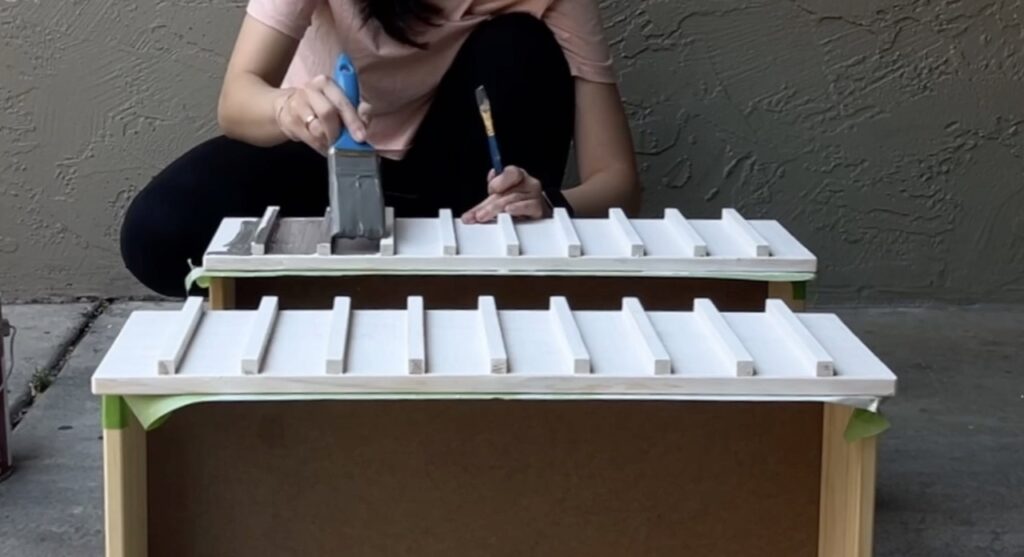
- Before painting, use a primer. This is important because the tannins in the wood will stain and yellow the paint over time, and the primer prevents this from happening. It also help ensure your paint adhere’s better.
- Once the primer has dried, paint the dresser into your desired color. I’m using a custom paint color from Sherwin Williams.
- For the edges, use an edge brush or a small art brush and for the larger surfaces, use a dense foam roller. You can also use a sprayer if you have one too.
Changing the Back of the Dresser + Adding Door Handles
- At the back of the dresser, you’ll see a thin piece of fiberboard. Remove this by using a hammer, and hammering from the inside of the dresser outwards. This will cause the fiberboard to be pushed out, which causes nails holding the fiberboard in place to also be gradually pushed out. Hammer gently to not cause damage.
- Once you see the fiberboard being pushed out, pull the nails out with pliers. The fiberboard board should fall off easily.
- Next, reattach the fiberboard behind the second and third drawer. You can use the original nails to hammer it back in, or use a nail gun.
- Lastly, measure and attach your handles to the middle of the drawers!
The Results
Here is the completed dresser! It is no longer bulky but is elegant and modern and looks completely different to the original. This IKEA hack took some time to complete, but the results are totally worth it. I love it!
Video Tutorials
If you have any questions, leave a comment below, in the YouTube video, or DM me on Instagram. I will help answer as best as I can!


Leave a Reply
You must be logged in to post a comment.