• Skip to primary navigation
  • Skip to main content
  • Skip to primary sidebar
  • Skip to footer
JnnLiuLiu Text Logo

JnnLiuLiu

Inspiring Home, Decor, DIY Tutorials

  • Home
  • DIY Tutorials
    • IKEA Hack
      • IKEA Hack – How to add Rattan to Malm Dresser
      • IKEA Hack – How to add Fluting to Malm Dresser
      • IKEA Hack – Complete Rast Dresser Makeover
    • How to Build a Fluted Coffee Table
    • How to Paint Tiles and What Tile Paint to Use
    • How to Build a Built-in Bookshelf
  • About

IKEA Hack – How to add Fluting to Malm Dresser

Aug. 20, 2023

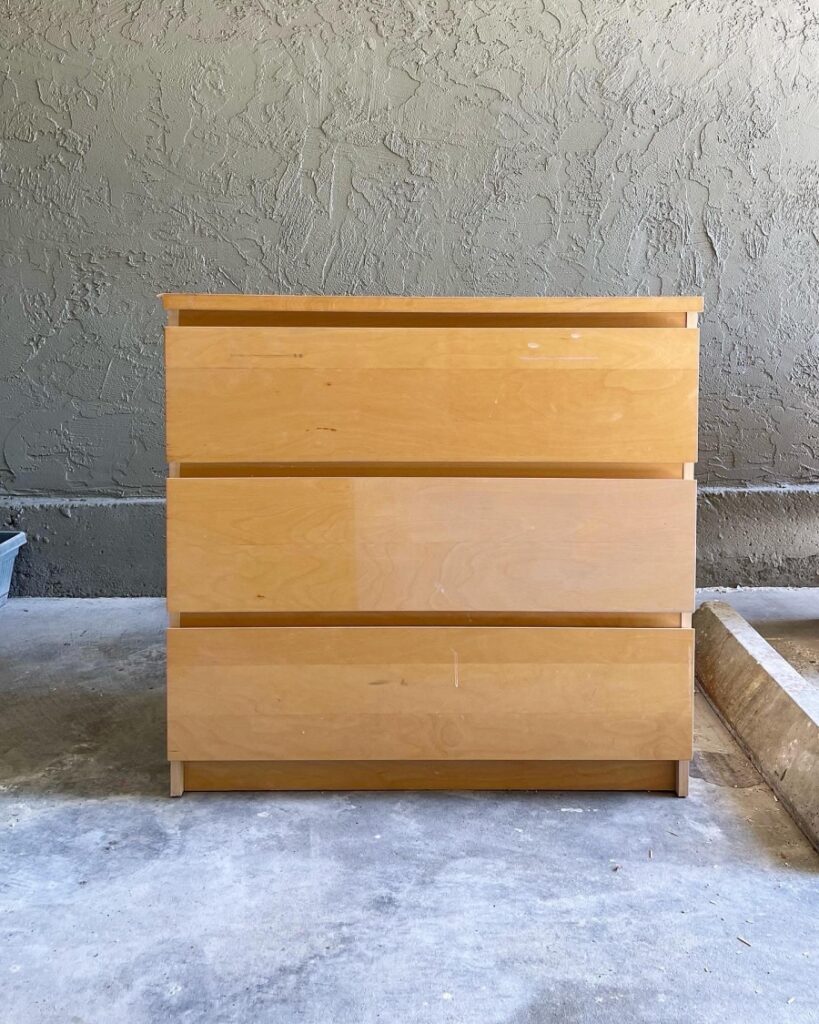
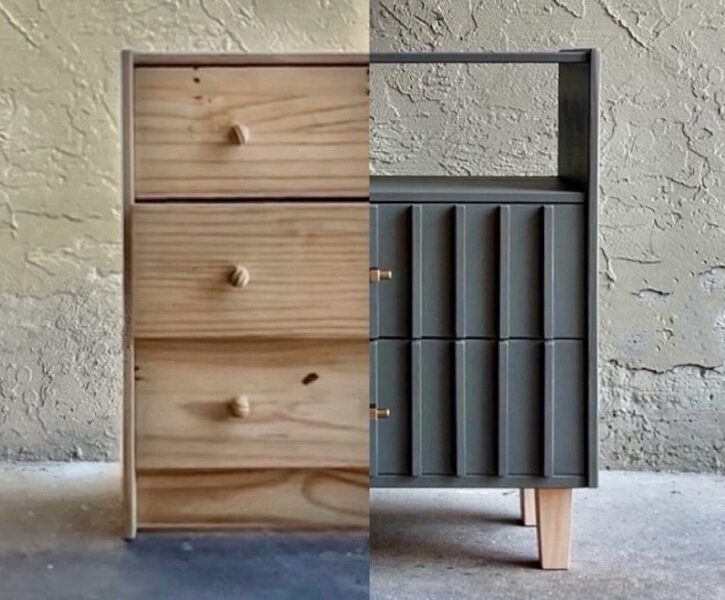
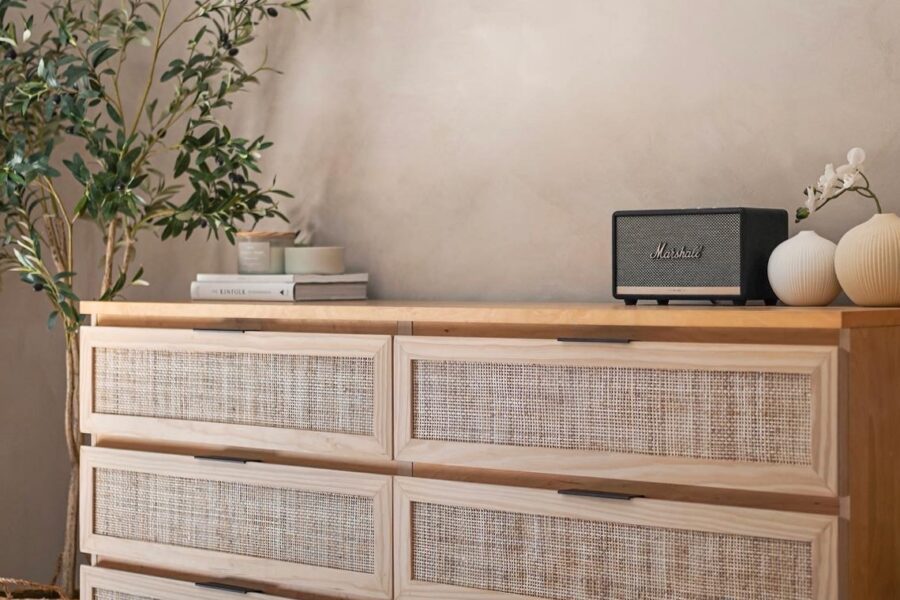
This is my 2nd IKEA hack tutorial for the Malm Dresser. In the 1st one, I added a Boho-inspired rattan design to the drawers, and in this one, I’ll show you how to add a fluted design instead! Both the designs complements various interior styles – from contemporary to minimalist, and even Wabi-Sabi and Japandi.

IKEA Malm Dresser Hack
IKEA Hack – before adding fluting to IKEA Malm Dresser.
Black Fluted IKEA Malm Dresser Hack.
IKEA Hack – after adding fluting to IKEA Malm Dresser.

Design Concept

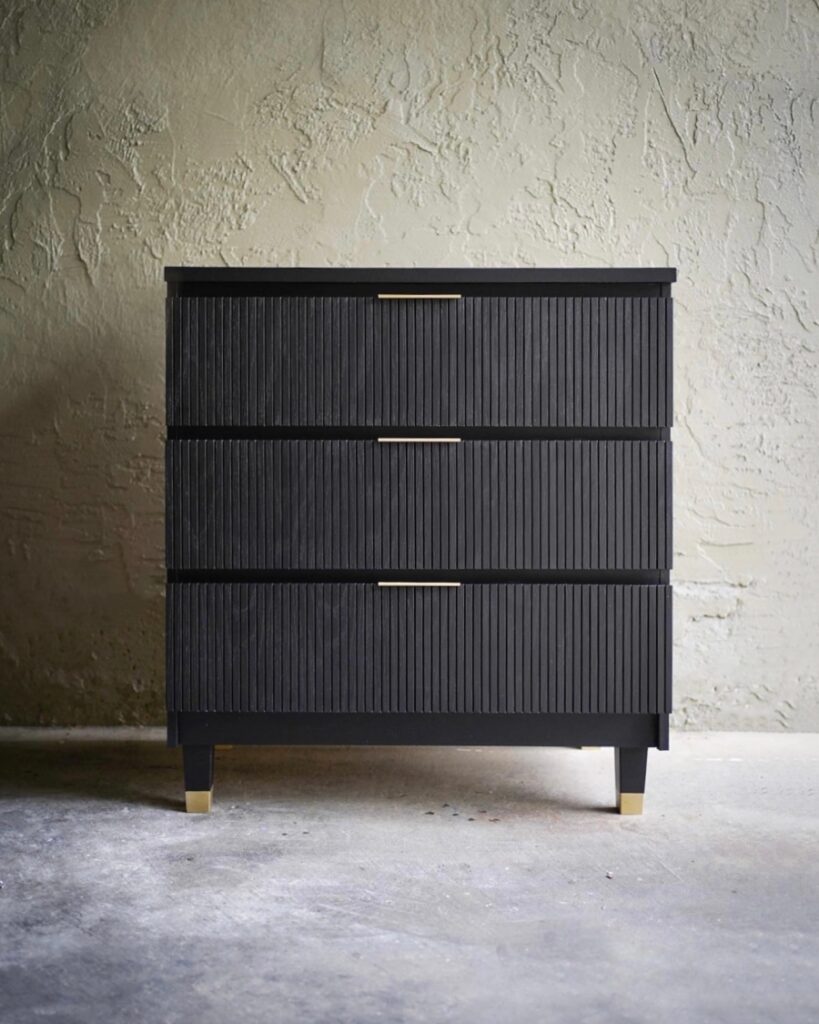
The IKEA Malm dresser design itself, is a little plain, so I used store-bought pole-wrap to give it a fluted design, added wooden legs to give it a more modern, less bulky look, painted it black and added gold handles.

Tools and Supplies Used

Below is a list of tools and supplies used.

Affiliate disclosure: when a purchase is made through the links below, I may earn a small commission from qualifying purchases on Amazon and other retailers.

  • Pole-Wrap (make sure to check you purchase the right dimensions): link.
  • Drill & Driver: link.
  • Circular Saw: link.
  • Sander: link.
  • Nail Gun: link.
  • Wood Filler: link.
  • Wood Glue: link.
  • Wooden legs (4.5″): link.
  • Drawer handles: link.
  • Wooden legs: link.
  • Behr Metallic Gold Paint: link.
  • Shellac-Base Primer: link.
  • Dense Foam Roller: link.

Step-by Step Guide

Add Fluting and Drawer Handles

fluted ikea malm dresser hack - applying glue
fluted ikea malm dresser hack - applying pole wrap

  1. Cut the pole-wrap down to match the drawer size. Pole-wrap is a fluted panel that can be found at Home Depot, Lowe’s and other local hardware stores.
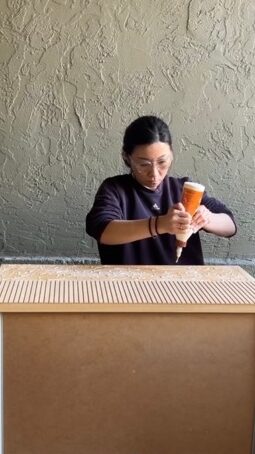
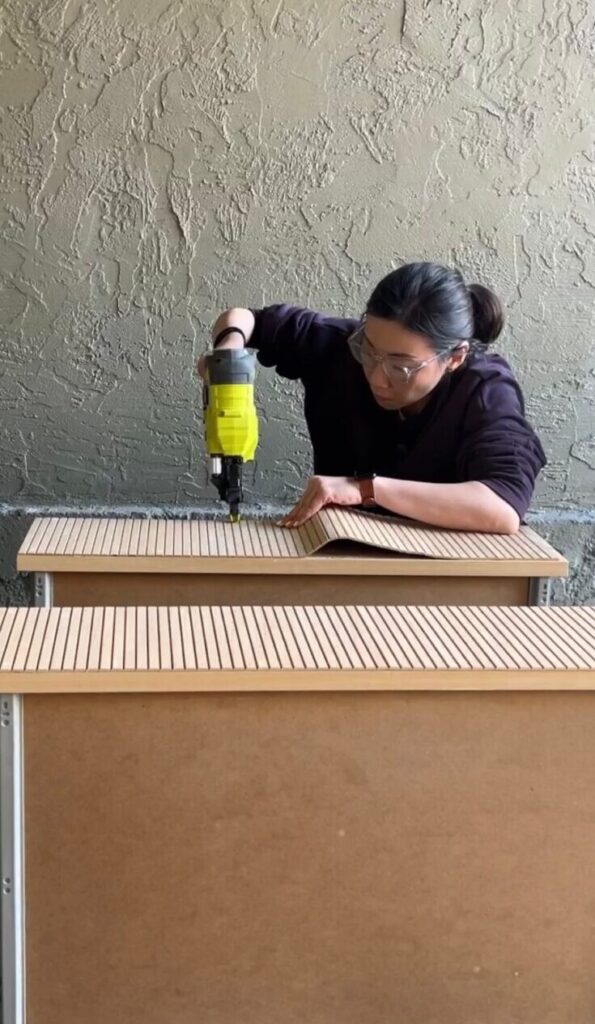
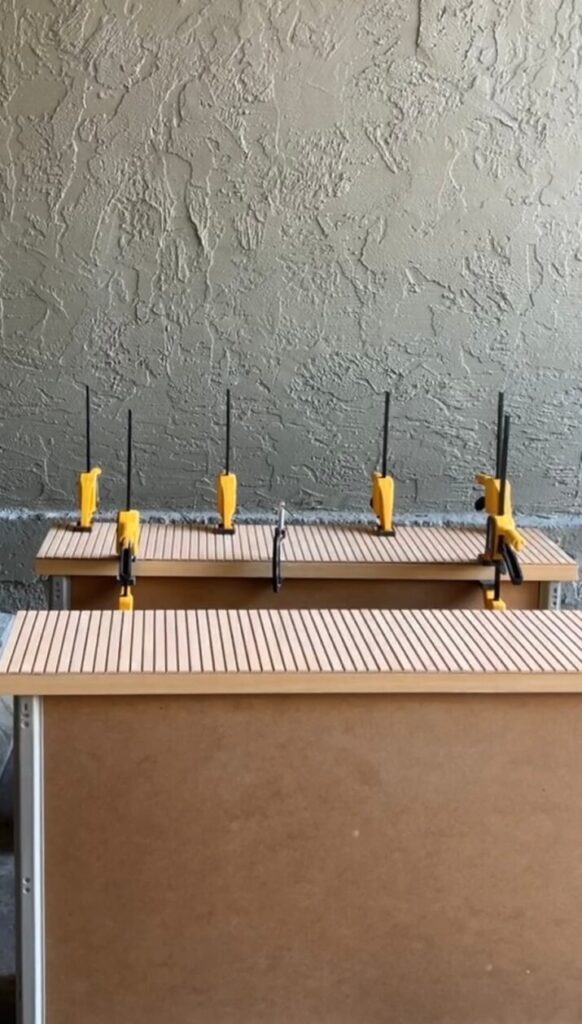
  2. Apply a generous amount of wood glue to the back of the pole-wrap and attach it to the drawer face using a nail gun. Take note that when nailing it down, nail from one direction to the other, and pull the pole wrap tightly to ensure the pole wrap is well attached to the drawer. If it isn’t well attached, the wood of the pole-wrap may expand/contract during weather changes and cause it to lift or bubble up.
  3. Once completed, use wood filler and fill in the nail holes. After nailing the pole-wrap to each drawer, use clamps to hold it down as the glue dries.
  4. The handles I had from previous projects was black, so I spray painted it gold (if yours is old, skip this step).
  5. Attach the handles. Note that as there is a slope to the top edge of the Malm drawer, not all handles fits well, so I recommend using the one I linked above.

Attaching the Legs

  1. Since the base of the Malm dresser is hollow, a base support needs to be created before legs can be attached. See video on how to create a base structure. 
  2. Once the base support is added, attach the legs. If you’re using the same legs I used, measure and mark where you want the legs. Next, drill a hole 1/2” in diameter and about 1” deep in the base structure, screw in the metal plate, and lastly screw in the wooden leg.

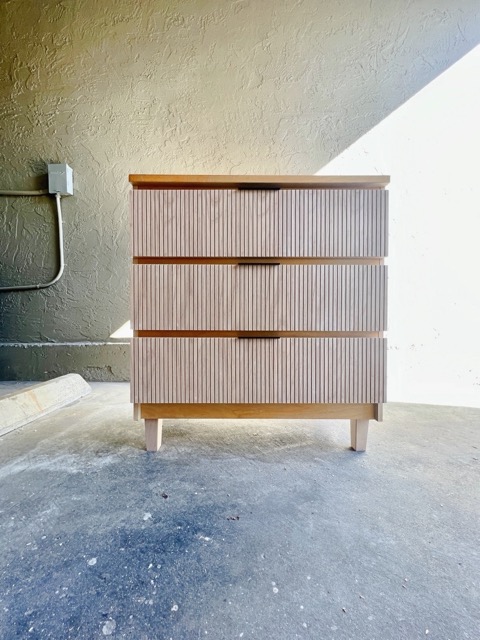
If you like the look of the natural wood tones, you can finish the dresser here, but if you prefer to give it a pop of color, you can proceed with the following steps to paint it.

Fluted IKEA Malm Dresser Hack

Painting the Dresser

  1. Before painting, use a shellac-based primer (not water-based) to prime the area you wish to paint. Note: do not skip this step! Shellac-based primer is needed as it adhere’s better to IKEA veneer furniture and increases the durability of the paint. For an even application, use a dense foam roller instead of a paint brush.
  2. Once the primer dries, sand over with a 400 grit sandpaper to smooth out the surface.
  3. Brush away any dust and paint the dresser into your desired color. I used Behr’s Black paint. Like before, use a dense foam roller to get an even paint application. Paint 2-3 layers and allow the paint to fully dry in between coats.
  4. For the legs, if you wish to paint it black and gold (like my design), first spray paint the bottom section of the legs and allow it to dry, then use painter’s tape to tape off and cover the gold area, and paint the top section black.

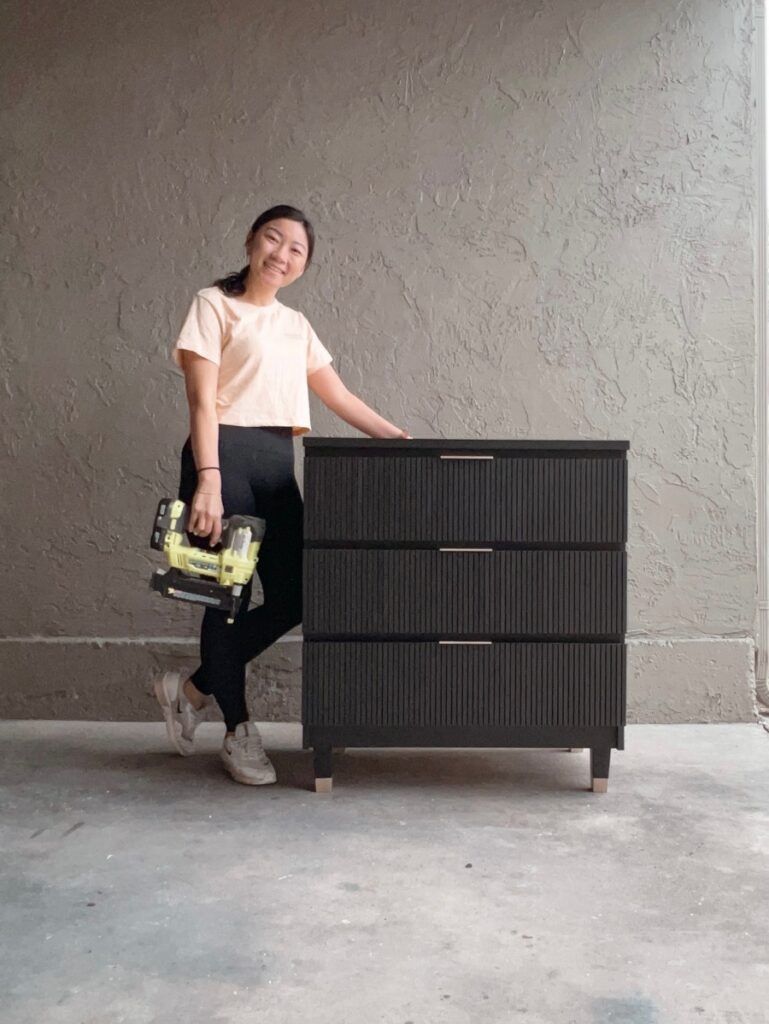
And here is the completed dresser! I love it!

Black Fluted IKEA Malm Dresser Hack.

Video Tutorials

If you have any questions, leave a comment below, in the YouTube video, or DM me on Instagram. I will help answer as best as I can!

Related IKEA Hacks

  • IKEA Malm Dresser – Adding a Rattan Design
  • IKEA Rast Dresser – Reconfiguring and Adding a Fluted Design

Category: IKEA Hack Tags: Fluted Furniture, IKEA Malm Dresser Hack

← Previous Post
IKEA Hack – How to add Rattan to Malm Dresser
Next Post →
IKEA Hack – Complete Rast Dresser Makeover

You may also like

Lime-Wash Tutorial
How to Lime-Wash a Bedroom
IKEA Rast Dresser Hack Before and After
IKEA Hack – Complete Rast Dresser Makeover
Rattan IKEA Malm Dresser Hack
IKEA Hack – How to add Rattan to Malm Dresser

Reader Interactions

Leave a Reply Cancel reply

You must be logged in to post a comment.

Primary Sidebar

Jenn Liu profile picture

Hey, I’m Jenn!

I learnt how to DIY with power tools within a few months, and I believe you can too.

I’m so happy you’re here! Feel free to email me if you have any questions, or reach out on Instagram.

  • Email
  • Instagram
  • Pinterest
  • TikTok
  • YouTube
  • How to Paint Tiles and What Tile Paint to Use
  • IKEA Hack – Complete Rast Dresser Makeover
  • How to Build a Fluted Coffee Table
  • How to Lime-Wash a Bedroom

Categories

  • Bathroom Makeover
  • Furniture DIY
  • IKEA Hack
  • Lime-Wash

jnn.liu.liu

Simple home office makeover with IKEA shelves🥰 - - Simple home office makeover with IKEA shelves🥰
-
-
#homeofficedecor #homeofficeideas #japandihome #wabisabihome #ikeahome #ikeastyle #ikeaideas #ikeadiy #ikealover #ikeahacks
I needed more space to put my home decor 😁Ikea Bil I needed more space to put my home decor 😁Ikea Billy shelves are great! Easy to put together and they look great when styled! ✨ 
-
-
#homedécor #ikeahome #wabisabihome #japandihome #ikeahack #ikeaideas #wabisabiinteriors #wabisabiinteriors #billybookcase
Movie night just got so much better with @xgimitec Movie night just got so much better with @xgimitech MoGo 3 Pro! 🥰✨ Love how compact, portable, aesthetic it is, and how it easily projects & auto focus from any angle using its Intelligent Screen Adaption technology. It also connects directly to our streaming channels! 🥰🥰

@xgimitech is offering Black Friday sales now - 16% off on MoGo3 Pro on Amazon and 53% off selected products on their site! Go check it out. Link in stories! 
-
-
#XGIMI #XGIMITECH #MOGO3PRO #ad #romo #cozyvibes #cozyroom #projectors #movienight🎬 #movienightathome #movienight
Yayy🥳🥳 Loving my DIY recessed shelf!! So much extr Yayy🥳🥳 Loving my DIY recessed shelf!! So much extra storage now!! 🥰💛 

Check out the previous video for DIY process! ✨
-
-
#homediy #bathroomdiy #bathroomrenovation #bathroomstyle #bathroomreno #homerenos #homerenovations #diyproject #diyideas
I finished the recessed shelf!!✨🥰 - - #bathroomdiy I finished the recessed shelf!!✨🥰
-
-
#bathroomdiy #homereno #bathroomideas #bathroomreno #diyprojects #diyproject #homediy #diybathroom #recessedshelf
Luckily…there is a Part 2! 😁😁 - - #diyproject #hom Luckily…there is a Part 2! 😁😁
-
-
#diyproject #homediy #homerenos #bathroomdiy #bathroomreno #bathroomrenovation #diyrenovation #diyremodel #bathroomstyle

Footer

Let’s be friends

  • Email
  • Instagram
  • Pinterest
  • TikTok
  • YouTube

More Info

  • About
  • Privacy Policy

Stay in Touch

Get the latest updates on upcoming projects, best DIY tips & ticks!

Copyright © 2025 · JnnLiuLiu

Lexi Theme by Code + Coconut